Forskjell mellom versjoner av «Metroplex 3D printer/bygging»
Hopp til navigering
Hopp til søk
(→Historikk: parts cracked while trying to assemble the extruder) |
(→Historikk: added inof from Roy (on slack)) |
||
| (Én mellomliggende revisjon av samme bruker vises ikke) | |||
| Linje 44: | Linje 44: | ||
== Historikk == | == Historikk == | ||
| + | ; 2020-03-07 : [[User:Royk|Roy]] reported (on slack) that he connected to Metroplex via OctoPrint, but when he tried to heat up bed and hotend nothing happened. Needs looking at. [[Bruker:Tingo|Tingo]] ([[Brukerdiskusjon:Tingo|diskusjon]]) 12. mar. 2020 kl. 11:53 (CET) | ||
| + | |||
; 2020-03-05: we ([[User:Royk|Roy]] and I) tried to assemble the extruder again, unfortunately some parts cracked while screwing in the screws that holds the Bottom body insert part to the Main body part. So nowe we need to print new parts. I extracted the Main body and Bottom body insert part (using FreeCAD) and exported as.stl (and .amf). Roy is going to print new parts at home. [[Bruker:Tingo|Tingo]] ([[Brukerdiskusjon:Tingo|diskusjon]]) 5. mar. 2020 kl. 20:05 (CET) | ; 2020-03-05: we ([[User:Royk|Roy]] and I) tried to assemble the extruder again, unfortunately some parts cracked while screwing in the screws that holds the Bottom body insert part to the Main body part. So nowe we need to print new parts. I extracted the Main body and Bottom body insert part (using FreeCAD) and exported as.stl (and .amf). Roy is going to print new parts at home. [[Bruker:Tingo|Tingo]] ([[Brukerdiskusjon:Tingo|diskusjon]]) 5. mar. 2020 kl. 20:05 (CET) | ||
| + | |||
| + | ; 2020-01-30 : I dissassembled the extruder, and found out that the only thing keeping the drive gear (model: 40T Gear v3) and hobbed wheel (MK7 Hob 8mm) together was friction. No tabs and grooves, no locking screws or anything else. So I superglued the two parts toghether, and left them to dry / set. [[Bruker:Tingo|Tingo]] ([[Brukerdiskusjon:Tingo|diskusjon]]) 5. mar. 2020 kl. 20:13 (CET) | ||
; 2020- - 2020-01-07 : jon_c put in a lot of work and managed to finish the build and start testing. Testing revealed that the cooling fan (30 mm) for the hotend isn't working properly. It will need to be replaced. [[Bruker:Tingo|Tingo]] ([[Brukerdiskusjon:Tingo|diskusjon]]) 8. jan. 2020 kl. 09:42 (CET) | ; 2020- - 2020-01-07 : jon_c put in a lot of work and managed to finish the build and start testing. Testing revealed that the cooling fan (30 mm) for the hotend isn't working properly. It will need to be replaced. [[Bruker:Tingo|Tingo]] ([[Brukerdiskusjon:Tingo|diskusjon]]) 8. jan. 2020 kl. 09:42 (CET) | ||
Nåværende revisjon fra 12. mar. 2020 kl. 11:53
Tilbake til Metroplex 3D printer.
Arbeidet går (sakte) fremover. Bitraffere med ledig tid og noe kunnskap om 3D printere og bygging av slike oppfordres til å delta.
Innhold
To-do
Følgende ting gjenstår før Metroplex kan brukes.
Anskaffe
- byggeoverflate (BuildTak) - vi venter og ser - kanskje det er greit nok å printe rett på aluminiumsplata med lim
Bygging
Gjenstående arbeid
- erstatte "hotend cooling fan" (30mm) - den virker ikke. Anbefaling fra jon_c er å bytte til en 40mm vifte.
- printe feste til den nye vifta https://www.thingiverse.com/thing:2767432
Ferdig
- montere termistor på aluminiumsplate (heatbed)
- lage filamentholder
- reparere / forbedre viftefeste på hotend
- kable ferdig
- bytte heater (inklusive å sette opp rele / SSR for 230V hvis det kreves)
en større heater(den som er i dag er mindre enn byggeplaten, og den er bare på 100 - 120 W). For eksempel en rund "silicone heater" 400mm i diameter. Geir Sire har donert en 400mm silicone heater.
Ikke aktuelt
- finne ut hvordan Z-probe kitet skal festes, montere og koble det opp (piezo-elementene / kontrollerkortet var for sensitive - de ble erstattet med en induktiv probe)
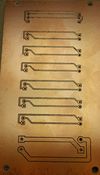
- frese et nytt og bedre koblingskort (PCB) for kabler
- lime på byggeflate (BuildTak)
Konfigurering og kalibrering
Printeren er satt opp med BeagleBone og Replicape[1] i dag. Kanskje det blir erstattet med Revolve[2] i fremtiden.
Må settes opp, konfigureres og testes.
Konfigurering
- konfigurere valgt termistor i firmware
Kalibrering
- kalibrere PID
Testing
- teste oppvarmingstid på heatbed - bytte til kraftigere heater hvis nødvendig.
- Kalibrere printeren.
- Kjøre testprint.
Historikk
- 2020-03-07
- Roy reported (on slack) that he connected to Metroplex via OctoPrint, but when he tried to heat up bed and hotend nothing happened. Needs looking at. Tingo (diskusjon) 12. mar. 2020 kl. 11:53 (CET)
- 2020-03-05
- we (Roy and I) tried to assemble the extruder again, unfortunately some parts cracked while screwing in the screws that holds the Bottom body insert part to the Main body part. So nowe we need to print new parts. I extracted the Main body and Bottom body insert part (using FreeCAD) and exported as.stl (and .amf). Roy is going to print new parts at home. Tingo (diskusjon) 5. mar. 2020 kl. 20:05 (CET)
- 2020-01-30
- I dissassembled the extruder, and found out that the only thing keeping the drive gear (model: 40T Gear v3) and hobbed wheel (MK7 Hob 8mm) together was friction. No tabs and grooves, no locking screws or anything else. So I superglued the two parts toghether, and left them to dry / set. Tingo (diskusjon) 5. mar. 2020 kl. 20:13 (CET)
- 2020- - 2020-01-07
- jon_c put in a lot of work and managed to finish the build and start testing. Testing revealed that the cooling fan (30 mm) for the hotend isn't working properly. It will need to be replaced. Tingo (diskusjon) 8. jan. 2020 kl. 09:42 (CET)
- 2019-07-05
- Revolve A3 is installed in Metroplex, Torfinn and Elias fixed the board to work with XYZ drivers and added a temporary solution to the end stop wiring. The board that Torfinn has made has turned out to be too fragile and broke during assembly. We also managed to install a box with a Noctua 92x14 mm fan and connected that to the on-board thermistor. We also installed a thermistor in the aluminium bed. We did not try to find the right thermistor in the list of thermistors, so that might have to be changed.
- 2019-04-04
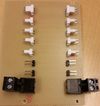
- today (finally!) I soldered connectors to the connector board.
 . Tingo (diskusjon) 4. apr. 2019 kl. 14:28 (CEST)
- 2019-02-28
- using the CNC3-3018Pro, I made a small connector board for the printer.
 Tingo (diskusjon) 4. apr. 2019 kl. 14:17 (CEST)
- 2019-01-23
- Elias and I tapped threads in the center holes of the aluminum rods, and screwed the top plate on. The cabling was moved, it needs to find a new home under or inside the aluminium rods at the top. Next we tapped threads for the bottom plate and screwed that on. Both operations required adjusting the length between the corners a bit. Finally we mounted the plate underneath the printbed. Because of the length adjustments between corners, the holes didn't fit, so we had to drill new holes. As usual pictures in the gallery below. Tingo (diskusjon) 23. jan. 2019 kl. 17:58 (CET)
- 2019-01-22
- the Precision Piezo Universal Z-probe Kit[3] that Jon C sent arrived. Thanks! Tingo (diskusjon) 22. jan. 2019 kl. 15:50 (CET) Tip from Jon C "Make sure to put a few millimeters of wood or silicone pads to insulate from the heat." Tingo (diskusjon)
- I dag har Elias og jeg frest ut topp-, bunn- og baseplater[4] til Metroplex. Se bilder lenger ned. Tingo (diskusjon) 22. jan. 2019 kl. 15:37 (CET)
- 2019-01-15 - 2019-01-18
- learning to use FreeCAD, I create (with help from others) design for a bottom plate (sits between the frame and the print bed), a top plate and a base plate (under the printer). Tingo (diskusjon) 21. jan. 2019 kl. 14:29 (CET)
- 2019-01-14
- Elias and I (with lots of help from other with more CNC experience) plane down a round aluminum plate that will be used as print bed for the Monster Kossel.
- 2019-01-10
- the Monster Kossel gets a name: Metroplex[5].
- 2019, first week of January
- Jon C. comes to Bitraf and builds the Monster Kossel. He has put some pictures of the build here[6].
Bilder
Topp-, bunn- og baseplate montert.
Lage plater til topp, bunn (under printplate) og base (under printeren).
Fresing (planering) av aluminium printbed.


